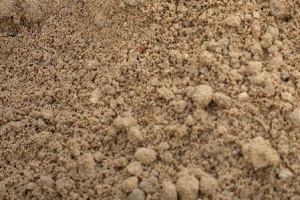
 When designing new garden trails or walkways, don’t overlook the charm and versatility of the simplest surface material, landscaping sand. Compared to materials such as brick, stone, or concrete, sand pathways bring some excellent advantages to your landscaping projects in terms of cost, installation, and customization.
Choosing the Right Landscaping Sand
When designing a garden pathway, the type of sand you choose makes all the difference. Regular play sand is too fine and powdery for walking trails—it tends to shift around easily, scattering in the wind or washing away with the rain. For building long-lasting pathways, go with sturdy landscaping sand instead.
What makes landscaping sand so great? It contains a blend of crushed stones, pebbles, and other durable aggregates perfect for withstanding foot traffic season after season. Properly packed down, it forms a solid surface that gives pleasantly under each step—firm but a bit yielding, comfortable yet supportive enough even for wheelchairs.
The coarser grains of landscaping sand also provide ideal drainage properties to keep trails from getting mushy after storms. Instead, rainwater can run off gently into surrounding planting beds or the lawn. It generally resists erosion much better than fine play sand, too, so you won’t have to constantly refresh mulched-over areas bordering the pathway.
Preparing the Base
Proper soil preparation is essential before pouring your sand. Till the area at least 8 inches deep, loosening the existing dirt. This allows the sand to mix slightly with the soil below, preventing the pathway from becoming muddy after storms.
Remove any weeds, roots, or grass growing in the pathway space. A weed barrier fabric can be laid first to hamper future growth, but it isn’t strictly necessary.
Level the ground into a gradual crown shape, higher in the center, sloping down to the sides. This allows rainwater to drain off the edges instead of pooling. Remove any bumps, divots, rocks, or sticks that could create uneven spots.
Edging Your Path
 Edging keeps the sand neatly contained within your path space. It delineates the trail while preventing spreading or erosion issues over time.
Flexible plastic landscaping edging is inexpensive and easy to install. Curves and corners take shape quickly. However, plastic edging tends to warp, crack, or pop up over years of use.
Bricks, concrete stones, or landscape timbers create attractive, sturdy edging but require more work to lay properly. Space garden edging pieces close together, burying the lower half underground.
Pouring and Leveling the Sand
With your soil prepped and edging in place, it’s time to pour the sand. Wheelbarrows help move bulk materials efficiently down garden paths. Shovels and rakes even out and shape the sand once dumped.
Aim for a finished depth of 2-3 inches when leveled. If pathway sections become thicker in spots, the sand will feel loose and shift under every step. Go slowly and check levels using a long board and spirit level.
Once laid smoothly, spray the sand lightly and tamp it down firmly with a wide patio pounder. This final compression stabilizes the pathway— keeping it flat, dense, and comfortable for walking.
Enhancing Your Sand Trail
Bare sand alone may seem plain. Fortunately, it’s easy to spice up sand garden pathways with decorative touches such as these:
- Gravel Accents – Mix small colorful pebbles or crushed granite into the sand for color and visual texture.
- Stepping Stones – Natural stone pavers sunk partway into the sand make for charming accents along straighter routes.
- Ground Cover – Hardy, low-growing perennials such as creeping thyme or Irish moss planted alongside the edging soften the look and require little maintenance.
- Lighting – Solar-powered LED garden lights running along or sunken into the path create a magical glow on summer nights, making it perfect for evening strolls.
Sealing and Maintenance
 Unsealed sand will erode gradually from foot traffic and wind, requiring occasional touch-ups. For better durability, apply a thin acrylic sand stabilizer sealer according to manufacturer instructions. Reapply sealant every 2-3 years.
Pull any weeds as they appear before they take root. Minor uneven spots can be leveled by clearing the area and adding a fresh layer of sand as needed.
With minimal upkeep, your sand walkways should provide years of reliably firm, comfortable use. They let creativity flourish pathside thanks to the excellent drainage. And there’s something so appealing about the soft, natural feel of sand underfoot as you take in your garden’s beauty.
Rely on Barclay Earth Depot for All Your Landscaping Sand Needs
Ultimately, sand pathways enable you to craft garden trails with versatility, customization, and budget-friendliness unmatched by other materials. Prep the base thoroughly, edge neatly to contain the sand, then pour, level, and tamp for optimal stability.
Feel free to complement with decorative accents before sealing to boost durability. With quality landscaping sand and proper technique, you’ll enjoy the natural, comfortable feel underfoot for years while showcasing your garden’s full splendor.
Barclay Earth Depot provides premium bulk landscaping sand perfect for constructing your dream garden pathway. Contact us today at 941.841.1681 or online to source top-grade sand that will bring your vision to life.

